I'm trying to submit my new Google Sites URL to the google search crawler, with their tools is overcomplicated, I'll try adding a link here:
The Best Temporary Google Sites Homepage Ever
I'm sorry for this noise...
Regards

domenica 18 agosto 2019

mercoledì 28 novembre 2018
Automatic check of media files integrity (Project)
check-media-integrity is an open-source Python script that decodes media files in order to check integrity. You can also check all the media files in a folder recursively.
I released the sources on GitGub, here
Any feedback or suggestion is appreciated, I look for ways to force stricter checks for Pillow, Wand and FFmpeg.

check-mi help:
Checks integrity of Media files (Images, Video, Audio).
positional arguments:
P path to the file or folder
optional arguments:
-h, --help show this help message and exit
-c X, --csv X Save bad files details on csv file X
-v, --version show program's version number and exit
-r, --recurse Recurse subdirs
-i, --disable-images Ignore image files
-m, --enable-media Enable check for audio/video files
-p, --disable-pdf Ignore pdf files
-e, --disable-extra Ignore extra image extensions (psd, xcf,. and rare
ones)
-x E, --err-detect E Execute ffmpeg decoding with a specific err_detect
flag E, 'strict' is shortcut for
+crccheck+bitstream+buffer+explode
- Single file check ignores options -i,-m,-p,-e,-c
- With 'err_detect' option you can provide the 'strict' shortcut or the flags
supported by ffmpeg, e.g.: crccheck, bitstream, buffer, explode, or their
combination, e.g., +buffer+bitstream
- Supported image formats/extensions: ['jpg', 'jpeg', 'jpe', 'png', 'bmp',
'gif', 'pcd', 'tif', 'tiff', 'j2k', 'j2p', 'j2x', 'webp']
- Supported image EXTRA formats/extensions:['eps', 'ico', 'im', 'pcx', 'ppm',
'sgi', 'spider', 'xbm', 'tga', 'psd', 'xcf']
- Supported audio/video extensions: ['avi', 'mp4', 'mov', 'mpeg', 'mpg',
'm2p', 'mkv', '3gp', 'ogg', 'flv', 'f4v', 'f4p', 'f4a', 'f4b', 'mp3', 'mp2']
- Output CSV file, has the header raw, and one line for each bad file,
providing: file name, error message, file size
check-media-integrity is an open-source Python script that decodes
media files in order to check integrity. You can also check all the
media files in a folder recursively.
For images, file truncation and damage on vital parts (headers) are always detected.
check-mi is not always able to detect minor damages--e.g. small portion of file overwritten with a different value--in fact media files (and codec) are resilient to this type of damage.
From my (few) experiments, with "zero fill" you need an extended damage to get a chance to see the problem, while with random noise you always get 85% chance of detection.
A movie or audio needs severe damage for the check-mi to detect the problem.
I released the sources on GitGub, here
Any feedback or suggestion is appreciated, I look for ways to force stricter checks for Pillow, Wand and FFmpeg.
check-mi help:
Checks integrity of Media files (Images, Video, Audio).
positional arguments:
P path to the file or folder
optional arguments:
-h, --help show this help message and exit
-c X, --csv X Save bad files details on csv file X
-v, --version show program's version number and exit
-r, --recurse Recurse subdirs
-i, --disable-images Ignore image files
-m, --enable-media Enable check for audio/video files
-p, --disable-pdf Ignore pdf files
-e, --disable-extra Ignore extra image extensions (psd, xcf,. and rare
ones)
-x E, --err-detect E Execute ffmpeg decoding with a specific err_detect
flag E, 'strict' is shortcut for
+crccheck+bitstream+buffer+explode
- Single file check ignores options -i,-m,-p,-e,-c
- With 'err_detect' option you can provide the 'strict' shortcut or the flags
supported by ffmpeg, e.g.: crccheck, bitstream, buffer, explode, or their
combination, e.g., +buffer+bitstream
- Supported image formats/extensions: ['jpg', 'jpeg', 'jpe', 'png', 'bmp',
'gif', 'pcd', 'tif', 'tiff', 'j2k', 'j2p', 'j2x', 'webp']
- Supported image EXTRA formats/extensions:['eps', 'ico', 'im', 'pcx', 'ppm',
'sgi', 'spider', 'xbm', 'tga', 'psd', 'xcf']
- Supported audio/video extensions: ['avi', 'mp4', 'mov', 'mpeg', 'mpg',
'm2p', 'mkv', '3gp', 'ogg', 'flv', 'f4v', 'f4p', 'f4a', 'f4b', 'mp3', 'mp2']
- Output CSV file, has the header raw, and one line for each bad file,
providing: file name, error message, file size
check-media-integrity is an open-source Python script that decodes
media files in order to check integrity. You can also check all the
media files in a folder recursively.
Warning
check-mi is not the definitive crystal ball. Thanks to my tool I performed an experimental campaignFor images, file truncation and damage on vital parts (headers) are always detected.
check-mi is not always able to detect minor damages--e.g. small portion of file overwritten with a different value--in fact media files (and codec) are resilient to this type of damage.
From my (few) experiments, with "zero fill" you need an extended damage to get a chance to see the problem, while with random noise you always get 85% chance of detection.
A movie or audio needs severe damage for the check-mi to detect the problem.
lunedì 19 novembre 2018
TWRP Installation on Asus Nexus 7 3g (2012), tilapia.
The following applies to the Asus Nexus 7 3g 2012, "tilapia" model, but I suppose that the procedure is the same for the "grouper"--WiFi only--model.
My Nexus 7 had only official Asus updates (Asus Lollipop Android), non-rooted.

The "recovery" is a boot-time utility useful for OS installation, and performing OS backups.
I used my Linux PC but I think that this procedure applies also to Windows and iOS, only with minor changes.
If you broke your Nexus 7 following this guide it's your fault, not mine.. I'm not responsible in any way. This procedure worked for me but software is too much complex for 100% confidence.
In case your Nexus fastboot is locked (normal situation) the following operation is going to delete the user data on your Nexus 7.. backup, backup, backup.
Download TWRP (for "tilapia") image on your PC from https://twrp.me/asus/asusnexus720123g.html (TWRP for WiFi only "grouper" is here https://twrp.me/asus/asusnexus72012wifi.html), let's download the twrp-3.x.x.x-tilapia.img file on your PC-- there are also apk packages, let's ignore them.
With your Nexus 7 Tablet on, enable USB Debugging: Settings > Developer Options > USB Debugging.
Sometimes, you have to enable Developer Options first:
adb reboot bootloader
Please note that you need to authorize debugging from your PC when performing the previous command.
(Optional: you can also perform this operation manually, the procedure is described later)
Then, unlock the fastboot (this operation invalidates the Nexus guarantee. :-) ):
fastboot oem unlock
A confirmation screen appears on the Nexus 7 screen, you have to select Yes and click "Enter" that is the Power button :-)
Then install the TWRP recovery:
fastboot flash recovery twrp-3.x.x.x-tilapia.img
Now, you have to reboot into recovery immediately in order to persist the change, you can reboot the device from the bootloader menu or with the command fastboot reboot.
During the reboot, you have to be very quick in order to access the bootloader again and perform immediately (manual way to enter the bootloader):
 Begin "Please Note"
there are lot of ways to perform the same operations. For example you can reboot in the bootloader with the command: fastboot reboot bootloader.
Perhaps you can also try: fastboot reboot recovery
But I simply described the operations I performed.
End "Please Note"
Now you are running TWRP, I suggest to use TWRP to perform these operations:
My Nexus 7 had only official Asus updates (Asus Lollipop Android), non-rooted.
The "recovery" is a boot-time utility useful for OS installation, and performing OS backups.
I used my Linux PC but I think that this procedure applies also to Windows and iOS, only with minor changes.
If you broke your Nexus 7 following this guide it's your fault, not mine.. I'm not responsible in any way. This procedure worked for me but software is too much complex for 100% confidence.
Installing TWRP recovery
You need Android-SDK installed on your PC, and for Windows you need also Andorid USB drivers.In case your Nexus fastboot is locked (normal situation) the following operation is going to delete the user data on your Nexus 7.. backup, backup, backup.
Download TWRP (for "tilapia") image on your PC from https://twrp.me/asus/asusnexus720123g.html (TWRP for WiFi only "grouper" is here https://twrp.me/asus/asusnexus72012wifi.html), let's download the twrp-3.x.x.x-tilapia.img file on your PC-- there are also apk packages, let's ignore them.
With your Nexus 7 Tablet on, enable USB Debugging: Settings > Developer Options > USB Debugging.
Sometimes, you have to enable Developer Options first:
- Go to "Settings".
- tap on "About phone" or "About tablet" entry,
- Scroll down to the bottom of the "About pho☺ne" and locate the "Build Number" field
- tap 7 times on "Build Number"
adb reboot bootloader
Please note that you need to authorize debugging from your PC when performing the previous command.
(Optional: you can also perform this operation manually, the procedure is described later)
Then, unlock the fastboot (this operation invalidates the Nexus guarantee. :-) ):
fastboot oem unlock
A confirmation screen appears on the Nexus 7 screen, you have to select Yes and click "Enter" that is the Power button :-)
Then install the TWRP recovery:
fastboot flash recovery twrp-3.x.x.x-tilapia.img
Now, you have to reboot into recovery immediately in order to persist the change, you can reboot the device from the bootloader menu or with the command fastboot reboot.
During the reboot, you have to be very quick in order to access the bootloader again and perform immediately (manual way to enter the bootloader):
- press and hold the Power key, and the Volume Down key.
- You are again in the bootloader, scroll down twice to select Recovery
- Select with the power key.
- you are in TWRP:
there are lot of ways to perform the same operations. For example you can reboot in the bootloader with the command: fastboot reboot bootloader.
Perhaps you can also try: fastboot reboot recovery
But I simply described the operations I performed.
End "Please Note"
Now you are running TWRP, I suggest to use TWRP to perform these operations:
- backup the original Asus Android OS (I put buckups into the Nexus /data/media/0/Download/ folder)
- use the adp pull (google is your friend) command to transfer the backup from /data/media/0/Download/ to your (USB connected) PC
- Perform a factory reset (TWRP Wipe)
- ..and finally install (Install button) a new preferred Andorid release for tilapia devices
In order to install a new Android version you have to copy the Android OS image, optional: gapps zip package, optional fix packages and rooting packages in the Nexus SD or
internal storage (I usually use /data/media/0/Download/ folder). When running TWRP, the Nexus (connected with USB) is accessible by PC with the adb command or,hopefully ,like USB storage (or MTP).
In detail, I suggest to install the Android AOSP 7.x.x AndDiSa release (xda thread with instructions):
https://forum.xda-developers.com/nexus-7/development/rom-android-7-aosp-grouper-t3467514
Please note: for the proposed SetupWizardFixCrDroidNexus7.zip fix was mandatory, I think you need to use it too.
Have fun,
Quoting my "success post":
I have successfully installed the aosp_tilapia-7.1.2-ota-eng-20181112.ds.zip on my Asus Nexus 3g 2012 (tilapia), I also installed open_gapps-arm-7.1-pico and Magisk v17.3.
I installed your Android release, by using TWRP-3.2.3-0-tilapia, over the Asus original fully updated Lollipop. In fact the most tricky part was installing TWRP
During installation the initial OS configuration failed, multiple times (I tried with reboots), just during the user account selection. Using the suggested SetupWizardFixCrDroidNexus7.zip fix, fixed the problem, and I was able to complete the device configuration.
Finally:
My Nexus is back to life, is very responsive, browsing and playing movies are very fast...
I have not tried all the functions (not tried camera yet).
With official Lollipop my Nexus was simply unusable, u-n-u-s-a-b-l-e, I used to think that my beloved Nexus was simply too old for the new applications. I think now that Asus(or Google, it is a Nexus device) released defective OS versions for manufacturer-planned-obsolescence

sabato 11 agosto 2018
Il modem Fastweb Technicolor MediaAccess DGA4131FWB è una ciofeca pazzesca
Con il passaggio a fibra vi cambieranno il vecchio modem, nel mio caso il TG789 e vi daranno forse lo 'splendido' MediaAccess DGA4131FWB (
1.0.1b)
È decisamente il peggior modem che abbia mai usato, e io sono vecchio.
Pure i TP-Link antichi, degli anni ruggenti, risultavano più affidabili e meno frustranti.
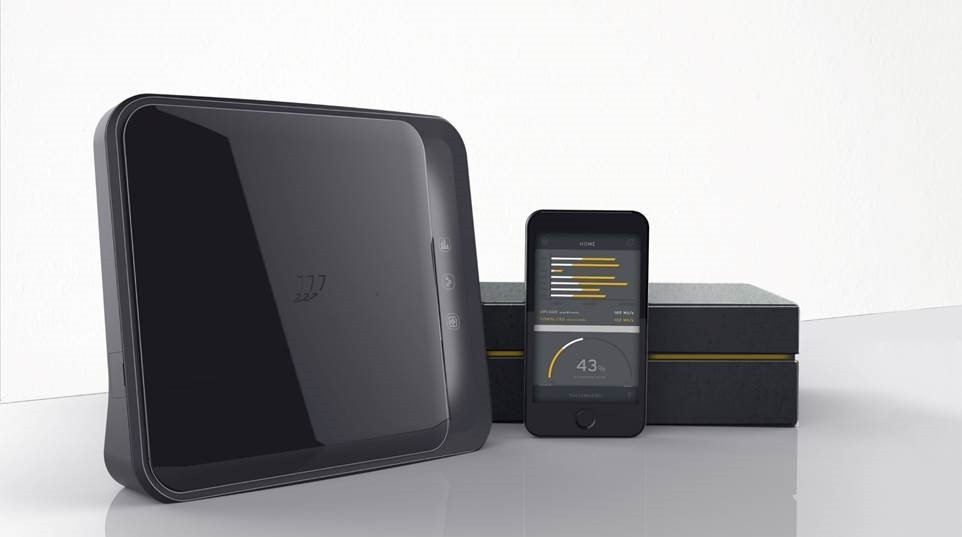
Il software sembra scritto da dei ragazzini della seconda superiore, ubriachi.. ma andiamo con ordine.
Si nota subito la modernità della nuova interfaccia web rispetto al vecchio modem Fastweb TG789, l'interfaccia è molto più post-Boost, insomma di gente che "ci sta dentro", figosa.. mica matusa.
Peccato non funzioni una minchia
Subnet
Se cambiate la subnet di default da 192.168.1.0/24 a non so.. 192.168.2.0/24 o 192.168.3.0/24, sembrerà funzionare, ma il NAT o il firewall non verranno configurati correttamente... e non navigherete mai in internet. Riavviare non cura.Quindi, potrete usare solo la subnet preconfigurata!! Questo pannello per la configurazione LAN è inutile.
Riavviate!
Se non riavviate il modem, anche se non richiesto dal modem stesso, al cambiamento dei settaggi potreste avere molti problemi con il salvataggio e modifica di altri settaggi; solitamente riceverete "errori di sbaglio" al tentativo di salvataggio
Riavviate!Riavviate!Riavviate!Fantasmi di configurazione
Primo: Le opzioni modificate e salvate possono riapparire nello stato precedente.
Secondo: Consideriamo i dispositivi configurati per una rete, se cambiate subnet, ragionevolmente spariscono ma non vengono eliminati... vengono parcheggiati da qualche parte nella configurazione. Riappariranno magicamente se rimettete la subnet precedente.
Ora, può anche sembrare un bene ma a volte riappaiono danneggiate. Questo fa molto pensare, è chiaro che come sviluppatori bisogna essere molto bravi e impegnarsi molto per garantire una configurazione consistente se si vogliono realizzare magie simili.. molto bravi. E questi non sono bravi.
Questo stesso giochetto viene fatto con le regole di port-forward. Le regole spariscono se cambiate subnet e riappaiono se rimettete la subnet precedente, ma quando riappaiono l'indirizzo IP è danneggiato e al suo posto compare un bel Unknown.
Consistente ed utilissimo!
Quindi, non c'è il minimo tentativo di questi sciagurati di tenere la configurazione del modem in uno stato consistente. Uno sviluppatore software assennato cercherebbe di eliminare le configurazioni non compatibili o di permettere, non rendendole invisibili, di rimuoverle manualmente.
Ma il buon senso lasciamolo ai druidi.
Interfaccia web di moda
L'interfaccia web, che bella, che beeellaaa.Se riavvii il modem da interfaccia dopo un poco la pagina da errore, prevedibile. Anche se si aggiorna o si ricarica l'URL su cui si era, a modem riavviato, si riceve naturalmente un errore, come giusto.
Ma non otterrente un errore del tipo: "riloggati cretino" magari con redirezione al form login, sarebbe chiedere troppo.
No... otterrete una sequenza di dialog "Errore Questo Quello" su interfaccia figosa che spuppa. Per uscire da questa situazione, o si chiude il tab del browser, inserendo poi a mano l'URL della pagina principale o si usa il tasto logout, che stranamente ancora funziona.
Ora, niente di drammatico, ma fa trasparire una cura per i dettagli che rasenta il nulla.

La linea di difesa
Personalmente mi sono sempre trovato bene con Fastweb, qualità assistenza e linea, ma questo modem è una schifezza.Il modem è anche la più importante linea di difesa informatica della casa. Un giocattolo del genere buttato su alla meno peggio con colla e puntine, che senso di sicurezza vi da?
Ho evitato di fare test sulla interfaccia web per vulnerabilità XSS o simili, ero già troppo triste.
venerdì 1 giugno 2018
quia homo numquam discit (because man never learns)
I like a lot Latin sentences because they sound like ancient wisdom that will last forever. Latin sounds cool.
Being a Machine Learning researcher I thought one Latin-like-maxim for my beloved science. If you like this joke, you can put this sentence on the stone door of your laboratory.
My maxim translates in:

I asked for a Latin translation because it sounds like an ancient wisdom, I thank the user Pacifica in this Latin forum for his help, I hope the translation is right, it sounds very nice.
Later, I found out that it is a reworking of a George Bernard Shaw quote "We learn from experience that men never learn anything from experience"
You know, I'm a ML researcher so I'm a bit biased
Being a Machine Learning researcher I thought one Latin-like-maxim for my beloved science. If you like this joke, you can put this sentence on the stone door of your laboratory.
The idea is a bit romantic and dramatic: we must teach machines because humanity is not able to learn from its mistakes.
quia homo numquam discit
My maxim translates in:
because man never learns

I asked for a Latin translation because it sounds like an ancient wisdom, I thank the user Pacifica in this Latin forum for his help, I hope the translation is right, it sounds very nice.
Later, I found out that it is a reworking of a George Bernard Shaw quote "We learn from experience that men never learn anything from experience"
You know, I'm a ML researcher so I'm a bit biased
lunedì 15 gennaio 2018
How to install TWRP (and LineageOS) with Samsung S5 (G900F)
I tried following the official LineageOS installation guide here, for klte (G900F) model, but the described procedure doesn't work (always).
If you broke your phone following my tips, it's your fault, not mine.. I'm not responsible in any way. Read all the linked resources first.
I'm not going to copy&paste here the official LineageOS installation guide, please refer to the LineageOS site for the complete procedure, I'll only fix the wrong parts. I have verified these steps with my Samsung S5 (G900F) phone, with a fully updated Android Marshmallow from Samsung.
Let's fix the wrong part, the TWRP installation:
The TWRP installation - the right way
The official guide tells you to use the heimdall opensource tool in order to flash the new recovery, TWRP. Forgot it and let's use the Odin software for Windows instead of heimdall. Odin is the official Samsung tool for flashing/managing the firmwares.
You can find it here on the xda forums.

If you have already installed Windows Samsung software.. like Smart-Switch you should have all the needed drivers for the Samsung phone. You can also use the Smart-Switch software to do a full backup... that is not a bad idea...
DO BACKUPS, DO BACKUPS.. Cloud or Local
Google for it
Then:
- Download the TWRP tar image for S5 klte into your Windows PC
- Activate the Android phone USB debugging mode (please Google about it)
- Connect the phone with a USB cable to your Windows PC
- Press the Volume Down+Home+Power buttons altogether, then confirm in order to enter the Download Mode.
- Open the ODIN application
- The phone may be detected and a confirmation brief message appears in the log tab (OK+something)
- In the AP field select the downloaded TWRP .tar file
- Select only the 'Reset Time' checkbox in the Odin Options tab (Re-partition is DANGEROUS and should be unchecked! And also the other checkboxes should be unchecked)
- Press the START button and the recovery will be flashed
- Reboot into TWRP recovery by pressing at the same time the phone buttons Volume UP+Home+Power
After TWRP installation you can follow the official instructions in order to install LineageOS.
Have fun
P.S:
With S5 you need to uncheck Odin "Automatic Reboot" checkbox.
This is needed because the automatic reboot replaces the TWRP with the original Samsung recovery.. you need to manually boot in TWRP at least once in order preserve it right.
domenica 3 dicembre 2017
WYSIFU vs WYSIWYG - What You See Is Fucking Useless
I'm pleased to introduce a brand new acronym: WYSIFU
Self coined by me during my pleasant LaTeX sessions.
What You See Is Fucking Useless
LaTeX is a pain in the ass, is anachronistic and the syntax sucks.. and is one of the best expressions of WYSIFU.
But LaTeX is mandatory in a lot of fields, people is totally insane, damn!
When using LaTeX I feel like an ancient scribe on a stone tablet.

Iscriviti a:
Post (Atom)